")


")


Drawing sports gear is a fantastic way to combine art and your love for the game. If you want to make a Football Drawing that looks great, you have come to the right place. You do not need expensive art supplies or years of practice to get started. All you need is a pencil, an eraser, and a piece of paper to bring your vision to life. Creating a football drawing is a fun activity that helps improve your hand-eye coordination and artistic skills. Whether you are doing this for a school project or just for fun, this guide will help you create a cool image that you can proudly show off to your friends and family.
Tools You Need for Your Football Drawing
Before you begin your football drawing, make sure you have the right tools ready on your desk. You will need a sharpened graphite pencil for the initial outline, as this allows you to make light marks that are easy to fix. An eraser is your best friend when learning how to perfect your football drawing because you will likely need to adjust your lines. Grab a black fine-liner pen if you want to make your final lines pop after you finish the sketch. Having a ruler can also be quite helpful to keep your shapes steady. Once you gather these basic supplies, your artistic journey becomes much smoother and a lot more enjoyable for everyone involved.
Start With a Simple Oval Shape
The secret to a great football drawing starts with a simple, basic shape. Lightly sketch an oval in the center of your paper to represent the main body of the ball. Do not press too hard with your pencil because you might need to erase parts of it later. A smooth, rounded shape acts as the perfect foundation for your football drawing. Take your time to get the size just right before moving forward. If it looks a little lopsided, simply use your eraser and try again until the shape looks balanced. Mastering this first step is the key to creating a professional-looking result every single time you sit down to draw.
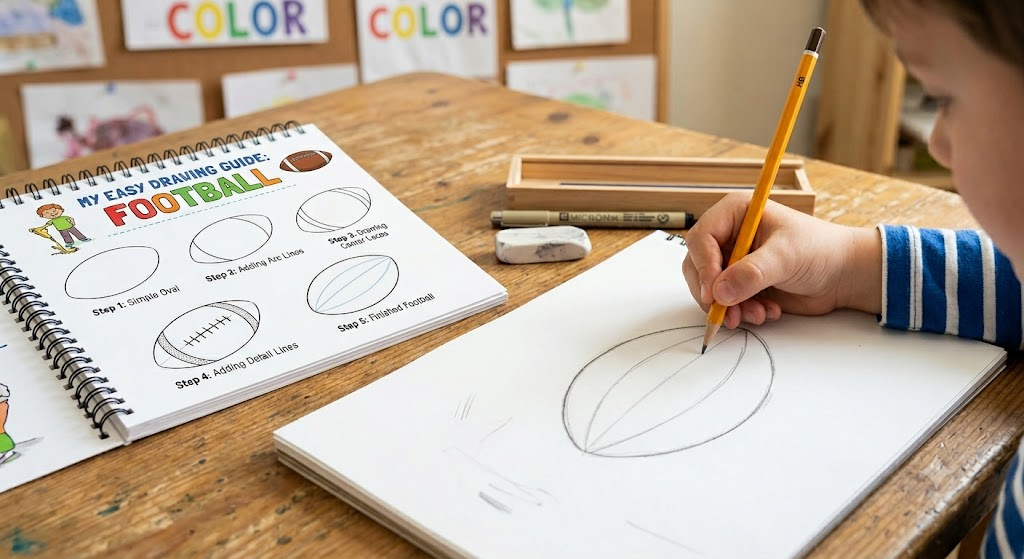
Drawing the Center Stitching Lines
Now that you have your oval, it is time to add the iconic details that make your football drawing look real. Lightly draw two curved lines running down the center of the oval. These lines act as a guide for where the laces will go. Think of them as a gentle path for your pencil to follow. Getting these lines centered is important for a realistic football drawing. If you are having trouble, imagine a line cutting the ball perfectly in half. Once you have these guide marks, you are ready to add the fun part, which is the detailed stitching that every classic ball is famous for.
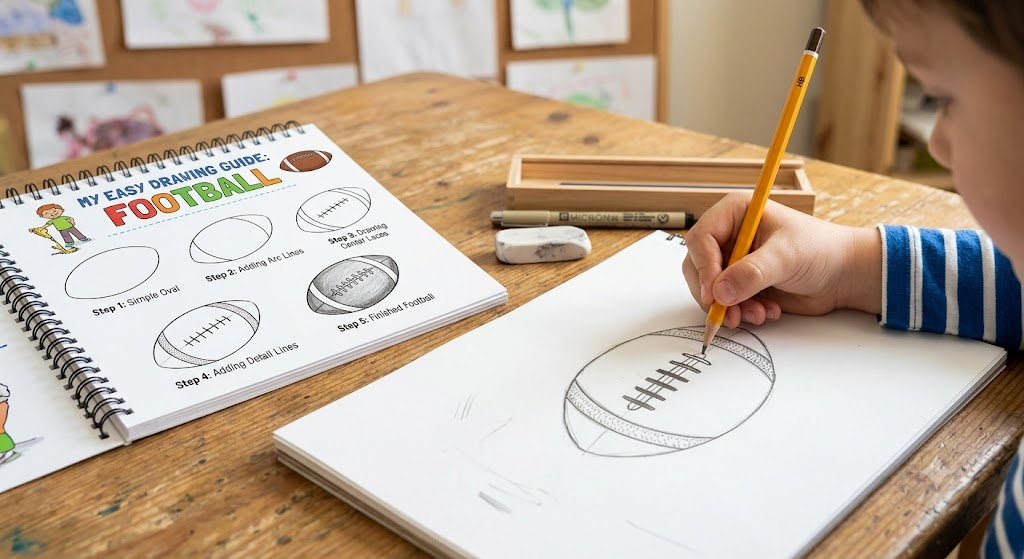
Adding the Famous Laces
The laces are what really define a football drawing and make it stand out. Draw a long, thin rectangle right between the two curved lines you created in the last step. Inside this rectangle, add small, horizontal lines to represent the actual stitches. This part of your football drawing does not have to be perfect; a little bit of character makes it look handmade and special. Focus on keeping the spacing between the stitches fairly even to maintain a clean look. Once you add these little details, your football drawing will start to look like a real piece of sports equipment that is ready for the big game.
Outlining the Shape for Depth
To give your football drawing a more three-dimensional look, you need to emphasize the outer edges. Go over your initial light oval lines with a slightly firmer hand or a black marker. This creates a bold boundary that makes your football drawing pop off the page. If you notice any jagged spots, smooth them out as you go. Think of this step as putting a frame around your masterpiece. A clear, crisp outline is essential for any great football drawing because it tells the eye exactly where the object begins and ends. Always stay steady and take your time to make those lines look neat and tidy.
Adding Texture to the Surface
A realistic football drawing needs to show the unique texture of the material. Use small, light dots or very short, thin lines across the surface of the ball to mimic the pebbled leather grip. You do not need to cover the entire football drawing with these marks. Just adding a few here and there near the edges creates a great visual effect. It helps the viewer understand that the ball has a rough surface. This simple trick adds a level of detail to your football drawing that makes it look like it was created by a real pro. Small textures truly make a big difference in the final look.
Shading for a 3D Effect
Shading is the magic step that turns a flat football drawing into something that looks like it is jumping off the paper. Pick one side of the ball to be the “dark” side where the shadows fall. Use your pencil to gently color that area, making it darker near the edge and lighter as you move toward the middle. This gradient technique is a core skill for any football drawing artist. When you shade correctly, you create the illusion of roundness. Remember to keep your shading smooth. If the transition looks too harsh, just use your finger or a tissue to smudge it slightly for a soft, professional finish.
Cleaning Up Your Work
Before you call your football drawing finished, take a moment to clean up your workspace and your art. Use your eraser to remove any leftover pencil guide marks or accidental smudges that might be floating around. A clean background makes your football drawing look much more professional and focused. Gently brush away the eraser shavings with your hand or a soft cloth. When your paper is clear of dust and stray marks, the main subject of your football drawing will shine even brighter. Always treat your artwork with care and keep your hands clean to avoid leaving fingerprints on your finished, hard-worked piece.
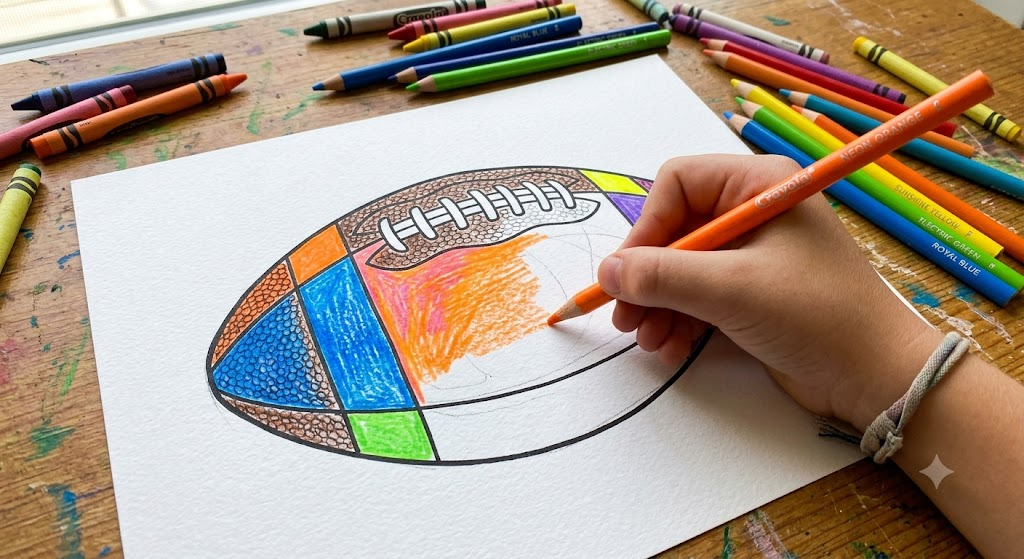
Adding Color for More Fun
If you want your football drawing to be extra exciting, grab some crayons or colored pencils. Traditionally, a ball is a deep brown color, but you can get creative and color your football drawing however you like! Maybe you want to add your team colors or make it bright and neon. Coloring is a great way to express your personality and style through your football drawing. Just remember to stay inside the lines you drew earlier. Take your time with the colors, and try to fill in the white gaps completely for a solid, vibrant look that really stands out on your bedroom wall.
Final Touches and Background Ideas
To finish your football drawing, you can add a simple background scene. Draw a green grass field at the bottom or some goalposts in the distance behind your ball. These little extras tell a story and make your football drawing feel like part of a bigger game. You could even draw a stadium crowd or some bright lights overhead. Adding a background completes the picture and shows that you put extra effort into your football drawing. Don’t be afraid to try different ideas; the more you practice adding these details, the better your artistic confidence will become with every single project you tackle.
Frequently Asked Questions
Is it hard to start a football drawing?
Not at all! As long as you start with basic shapes like an oval, you can easily build a great football drawing in just a few minutes.
What if my lines are not straight?
That is totally fine. Art is about practice, and even pro artists use erasers. Keep trying, and your next football drawing will be even better.
Can I use markers for my football drawing?
Yes! Markers are fun, but be sure to use them for the final lines since they cannot be erased. Plan your football drawing with pencil first.
What age is this guide for?
This guide is perfect for anyone wanting a simple way to create a football drawing, especially for beginners and kids who love sports.
How do I make the ball look round?
Shading is the trick. By adding a bit of shadow to one side, your football drawing will instantly look more like a 3D object.
Should I draw the laces first?
It is usually easier to draw the oval shape first and then add the laces afterward to keep your football drawing perfectly centered.
Conclusion
You did a fantastic job following along with these steps to create your very own football drawing. Art is all about having fun and letting your creativity flow, so keep practicing whenever you have free time. If you enjoyed this guide, why not try drawing other sports items or even a football player next? Sharing your work with friends is a great way to stay motivated. We would love to see how your project turned out, so keep creating, keep practicing, and most importantly, have fun with your next big art project!